brick by brick
Last summer we embarked on a project that was years in the making... or at least years in the planning.
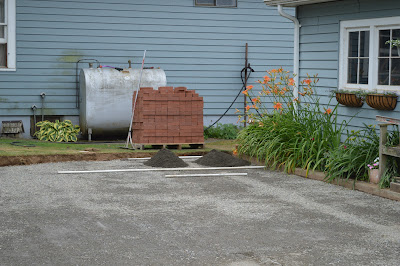
We took our "back yard" gathering space from this...
To this!
And let me tell you this project was a BEAST! We had been planning some sort of patio for this area for a number of year. The only thing we knew was that we did not want it to be a poured concrete patio. We (by we I mean my husband) researched a number of paver/brick options. There are so many products that the color/style is unlimited. We originally thought we would use some kind of concrete paver, mostly because of ease of installation and cost. Then as we were whittling it down to just one or two options my husband came out of nowhere with bricks! Real clay bricks... 3600 real clay bricks to be exact.
So on a overcast June weekend (isn't it always overcast in June?) we started in on the project.
We had the size we wanted in mind and a line was dug that would become a rough outline.
The next day was adding gravel and leveling again.
Then lots of watering of the gravel to settle it.
Each of these pallets had 600 or so bricks... which were all unloaded off of this trailer... by hand. Yes, we touched every single one of these bricks to unload them. Gloves were a must and I actually wore completely through my first pair at this point.
And have I introduced you to Hershey? Our chocolate lab puppy? She was not quite one year old at this point and really loved to lay in the nicely leveled sand that goes under the bricks.
It took all of a day to get to the this point... and did I mention we thought we'd have this knocked out in a long (3 day) weekend? Uhm, that would be a no.
By our third day of the project I wasn't so happy about the sun, nor the fact that this patio is in the sun most of the day, which would be nice once it is done but not so nice when you are schelping bricks and laying them!
At this point, I too was laying bricks. You can still see my staging for color/lot variation to the right.
And more bricks... it felt like this was never going to end. I think I may have actually cried at this point one evening.
So I took a break and took some pretty, out of focus pictures so I could enjoy how nice it would look someday.


And I must say, I was thrilled with the outcome and the herringbone pattern we had chosen! And can you see here what I mean about the different colors! Believe me, there are 6 different colors!
At this point we took the next few weeks off before the edging was finished and a few more weeks before the ground was prepared and grass planted. During that time we cleaned up/pressure washed a cement table we had acquired and added chairs and an umbrella. I decided I liked the chippy painted concrete and we left it as is... I also decided to use metal chairs instead of the 3 benches we have. They'll find a place in the gardens someday.
I spent many sunny afternoons and lunches here... even a dinner or two was enjoyed here last summer.
The flowers along this bed lined the patio and looked so good against the brick.
It really was just the right touch for an old house.
And by late August this area looked so good and was used daily! Nothing like a pop of green grass against bricks!
Hope you are enjoying late winter/early spring,
Chris


checking in
ReplyDeleteThis comment has been removed by the author.
ReplyDeleteYour had work turned out so nice. Love the brick patio
ReplyDelete