cath kidston, ikea & my mom
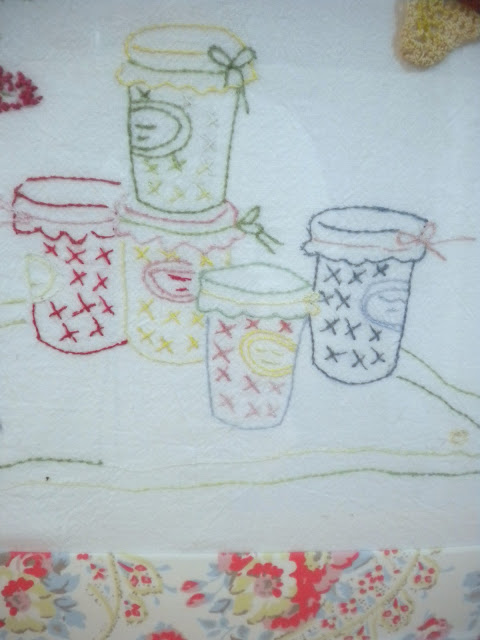
When she got home she gave me these three pieces that she had worked on. I framed them up with frames I from Ikea. I love the Ribba series of frames from Ikea... simple and they come in black or white as well as a multitude of sizes. However, at the time the largest piece didn't fit well any any frames that would fit where I wanted the pieces to hang... so I used a frame that I already had, a long skinny one meant to hold three small photos. I was never quite happy with it since it cut off part of the stitchery as you can see here.
This is where the piece had been, above my "medicine cabinet" chalkboard in a corner of my kitchen (and yes, please ignore the dead tulips... oops!). Off to the right you can see the other two pieces... and yes, I should have take a "before" picture before I actually started this little makeover!
Hmmm, perhaps I should straighten these a bit when I throw out those tulips!
Recently Ikea added another size of frames to their Ribba series and I realized it would be a much better fit for the space AND for the actual piece of stitchery .. and for a mere $14.99 how could I go wrong? I knew I wanted to change it up just a little bit but wasn't quite sure how... after a couple of weeks of thinking about it I realized I had the perfect scrap of Cath Kidston fabric (left over from my kitchen window topper). I dug it out of my
With a bit of spray glue, the fabric and the mat that came with the frame, well my idea was to cover that mat with fabric! And in a fun twist I realized that my mom had stopped at a Cath Kidston store in London, how appropriate to marry these two together (and I was the lucky recipient of some birthday goodies that year).
I also realized that I needed to come up with something to cover up this little random scale that was in the upper right hand corner of the piece.... I think it was a little "test spot". Before it was tucked under with the old skinny frame but with this mat and frame it would be visible... hmmm. What to do?
For the first step I cut out the center of the fabric, no use wasting this small piece of Cath Kidston fabric!
Then I took the mat, fabric and spray glue outside, just like the directions say, and sprayed the mat and carefully laid out the fabric smoothing any wrinkles as I went. The spray glue allowed me to pull the fabric back up when I had a wrinkle... although I don't think you'd get a second chance with paper!
Back inside to take care of wrapping the fabric around the mat. First I mitered the inner corners...
And then started gluing the inside edges down with a quick drying glue that is good for paper and fabric. I trimmed the outside corners and did the same all around the outside edge. It was bit messy since the glue came through the fabric. The backside of the mat isn't the prettiest but that won't be seen when it's finished any how.
I like these little jam jars... just like the real thing!
And here it is in it's spot. The larger size is much better scale with the chalkboard and none of the stitchery is covered up now.
I really like that the fabric adds a little bit of a pop to the piece without making it too bold like a colored mat or frame might have.
All three... so happy together. I like this so much I may just have to use fabric on a few other mats around the house....
But first I'm off to work on that list on my chalkboard... gardening is never done.
linking up to


That is s cute! What a great idea to use the fabric with it.
ReplyDeleteCool that your mom got to spend time in England. My DD studied in Europe but I have never gotten the chance! Maybe someday!
And so pretty together! I love that you added the fabric to the matting and the little doilies are so cute. How wonderful that your mom made those pretty pieces for you on her travels.
ReplyDeleteYou are inspiring me to take up stitchery and to make a run to Ikea. Beautiful grouping!
ReplyDeleteHi Chris, My name is Elizabeth & we just bought some property out on the peninsula. We just love Washington. We will be retiring there in about 3 or 4 years. I love reading your blog about your life out there. Elizabeth
ReplyDeleteBrilliant! Next time I'm signing on a trip, I'll definitely be doing this. :) Got my eye on your next posts.
ReplyDeleteSo sweet Chris!! Always so creative!!! xo Heather
ReplyDelete