holiday project #6 - baker's twine and bottle brush trees
I think I've officially reached a record with my holiday projects this year! Number 6 and I have one more to go that I think I'll even get done...
This one almost didn't happen. I came across the idea for the mini snow globe ornaments on Pinterest (where else you ask?)... of course I immediately went to Etsy and found a seller for the little glass globes and bases but then I made the mistake of not ordering them right away and the next day, GONE! I then spent a number of days searching and all of the sellers were in Hong Kong... with shipping times to match... and there's a reason for the phrase "slow boat to China". Finally I found them on Etsy from this seller in California BUT I would need to order all three pieces separately but the cost was still quite reasonable at under $2.00 per globe.
I had tons of little bottle brush trees in my stash. Green and white. And you may notice that the tiny ones were still a bit too tall but a sharp pair of scissors solved that problem.
The little brass bottoms.
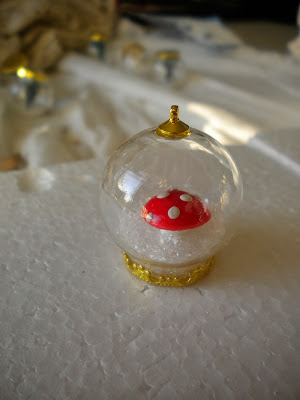
The cute little globes... and here you can see how the bottoms fit on.
And I did track down glue that was meant for glass and metal... very important since I have found that hot glue doesn't always work on glass items.
First I cut off the bases of the trees to make them the right height... and you might notice that a cute little spun cotton mushroom worked it's way into the lineup of twelve. For THIS step I did use hot glue and the trees are still sticking to their bases as we "speak".
Then came the hard part. Putting a small amount of the glass/metal glue around the brass base and flipping it upside down, inserting it into the glass globe and holding it for a good 30 to 45 seconds while the glue did it's magic. I did manage to adhere my fingers to quite a few of the bases since the glue worked it's way through the little metal filigree edges, fortunately this glue isn't quite as strong as super glue and I could get them off... but I think each and every snow globe carries my thumb print on the bottom!
I let them cure overnight so that the glue was very, very dry/cured.
If you can find the globes with these little things on top already, I would buy those since this WAS the hardest part...
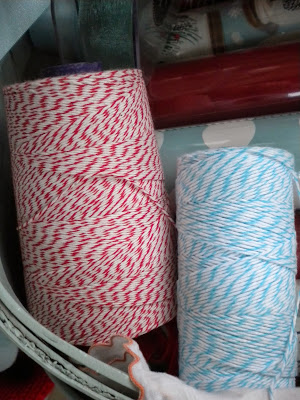
Now I was going to add really tiny little jingle bells to the tops but realized my baker's twine didn't fit through the jingle bells... so that was out but the red and aqua baker's twine was still in. And just barely in...those little tops are meant for a jump ring so the baker's twine barely made it through the opening.
And then I couldn't resist pulling my aqua ceramic egg tray out of the fridge for a photo shoot....
And show them off on the tree...
One of each...
Of course...
I think I may be looking around for what else I can fit in these mini globes... little reindeer? the jingle bells I couldn't use... more mushrooms? And have a second edition next year.
Of another, even dozen.


I LOVE them, so sorry it was a project with so many intricate details! They look adorable though. Good job.
ReplyDeleteThose are so adorable, really! Wouldn't little reindeer and a the tree together be sweet, if you could squeeze them both in?
ReplyDeleteThis was a nice project, thanks for showing us the process. xo
Totally adorable! And oh yes, try the reindeer!
ReplyDeleteYou have the best projects! They look great...you always have something inspiring! -Mary
ReplyDeleteThey are adorable! I think I'd like to make some and use them as place cards on the Christmas dinner table. Using the guests names or initials and then give them to guests as a favor. Thanks for sharing.
ReplyDeleteThese are so cute! Glad this glue isn't quite as sticky as super glue. :-) ( I did glue two of my fingers together with super glue once, when I was helping my son glue the weights to his pinewood derby car for scouts. That was not fun.)
ReplyDelete